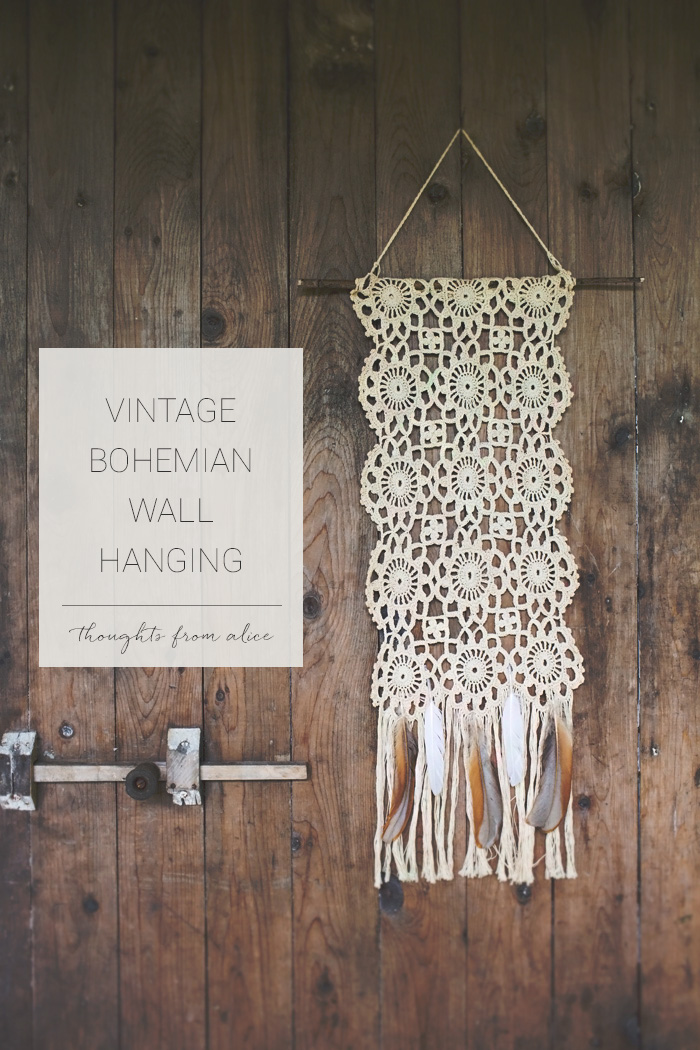
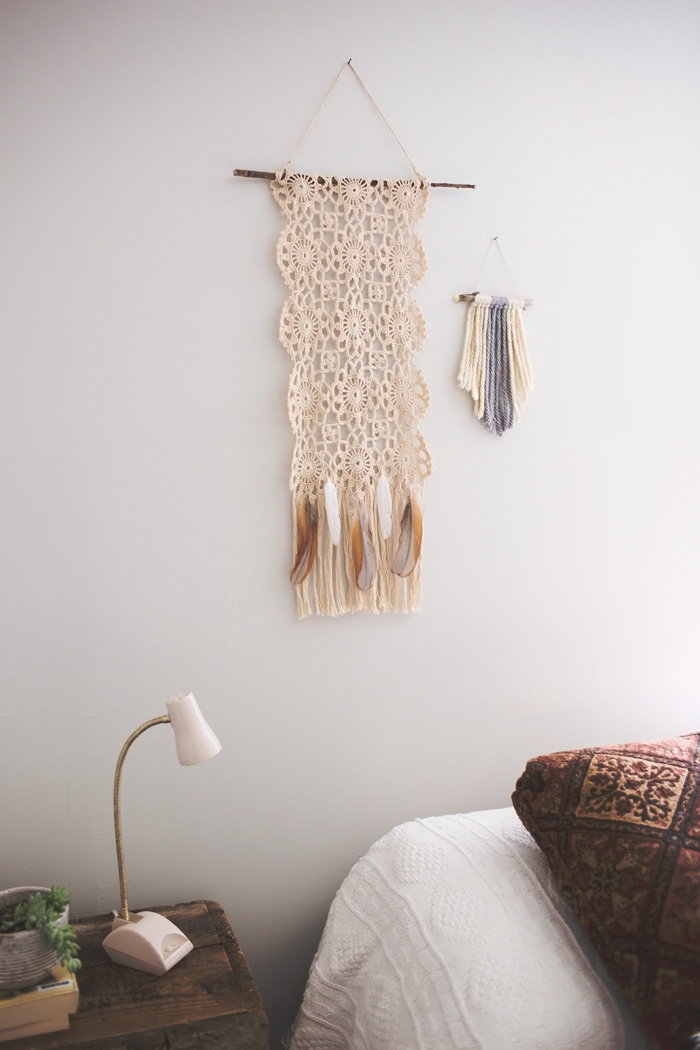
What happens when you take a thrift store doily, hang it from a branch, and add some feathers? You get a vintage inspired wall hanging with bohemian style! I’ve had this crocheted doily hanging in my upstairs gallery wall for several months but decided to give it a little tweak. It already had some boho flare with the fringe at the bottom, but I wanted to enhance it even more and finally did…
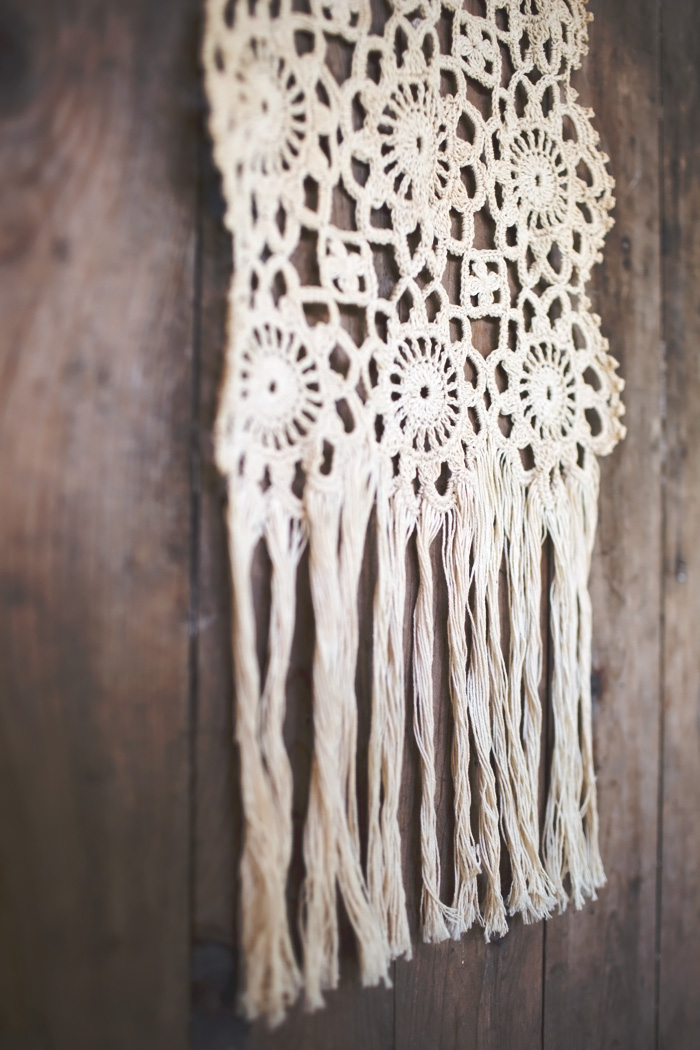
This was nothing too fancy, mind you, and 99% of the work was already done for me, which made putting it together super easy. I am always amazed by the skill and talent of people who can crochet like this. Such tiny, intricate detailing!
Definitely not in my skill set. But embellishing? Now, that I can do.
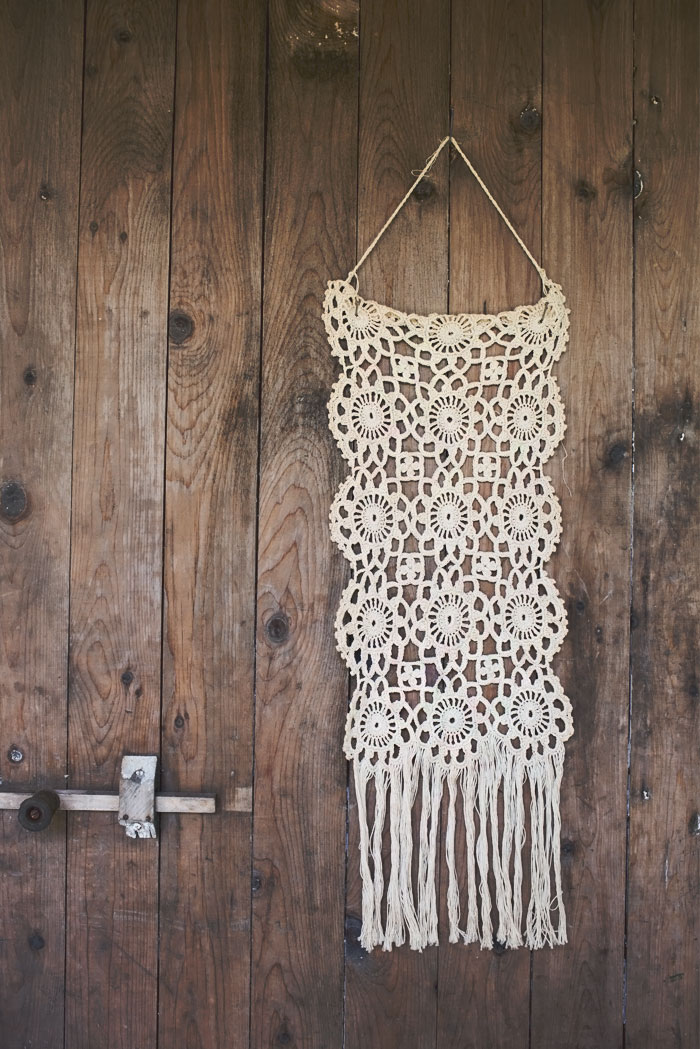
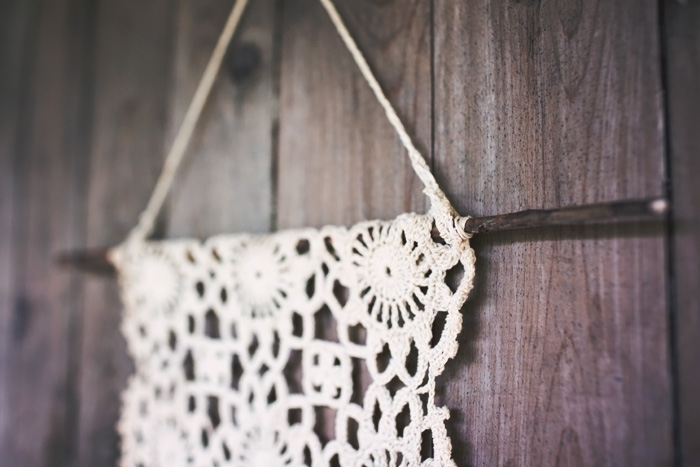
Here is how it looked before:
It was very beautiful and honestly looked good as is. You can see how I displayed it previously
here.
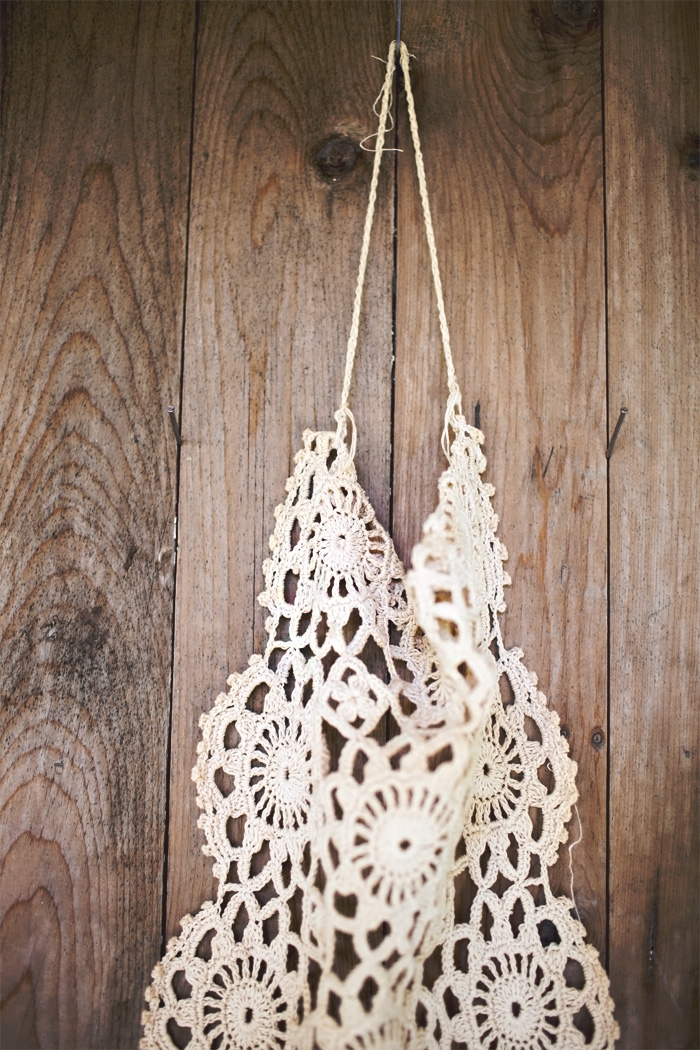
The problem was that in the current state, it required three nails to hang it on the wall, otherwise it drooped in the center.
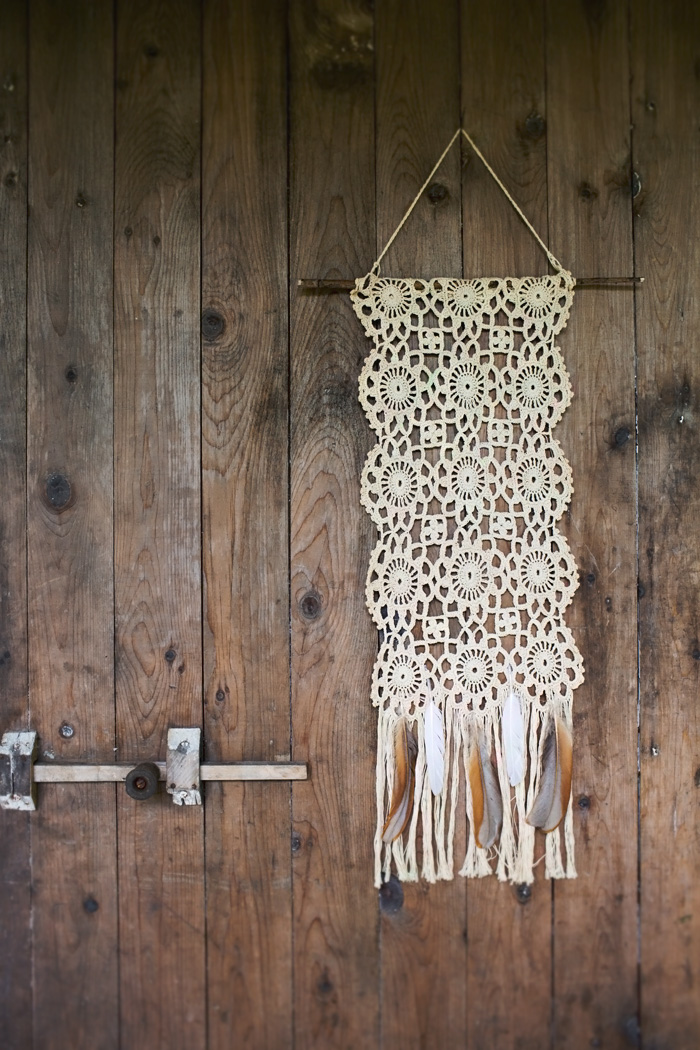
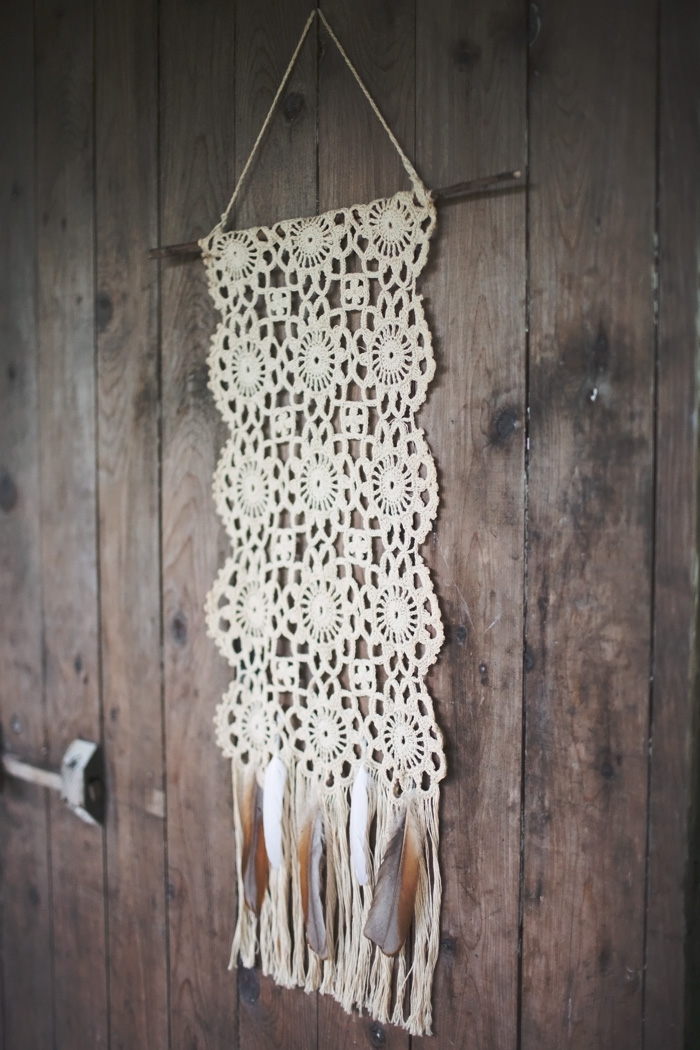
Since someone before me had sewn the very top over about an inch, I was able to grab a stick from the yard to slide through. It now hung perfectly from the string and stayed flat (and required only one nail to hang it up).
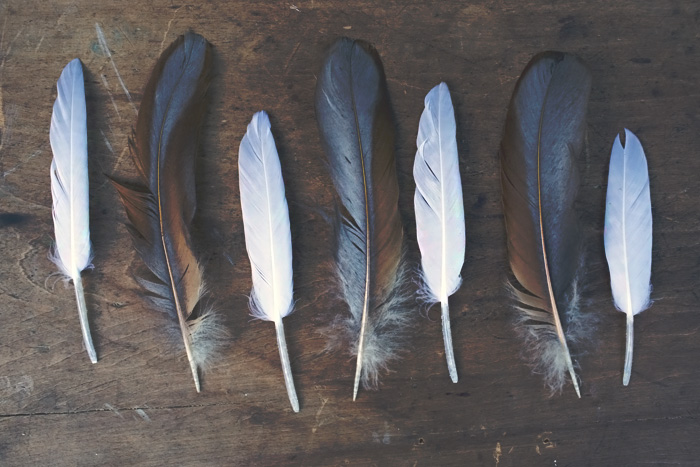
The next little bohemian upgrade was to tie some feathers to the bottom.
I laid the feathers out in a pattern that I liked, and then tied them evenly spaced across the bottom fringe. To do this, I took two strings from the fringe and double knotted them around each feather.
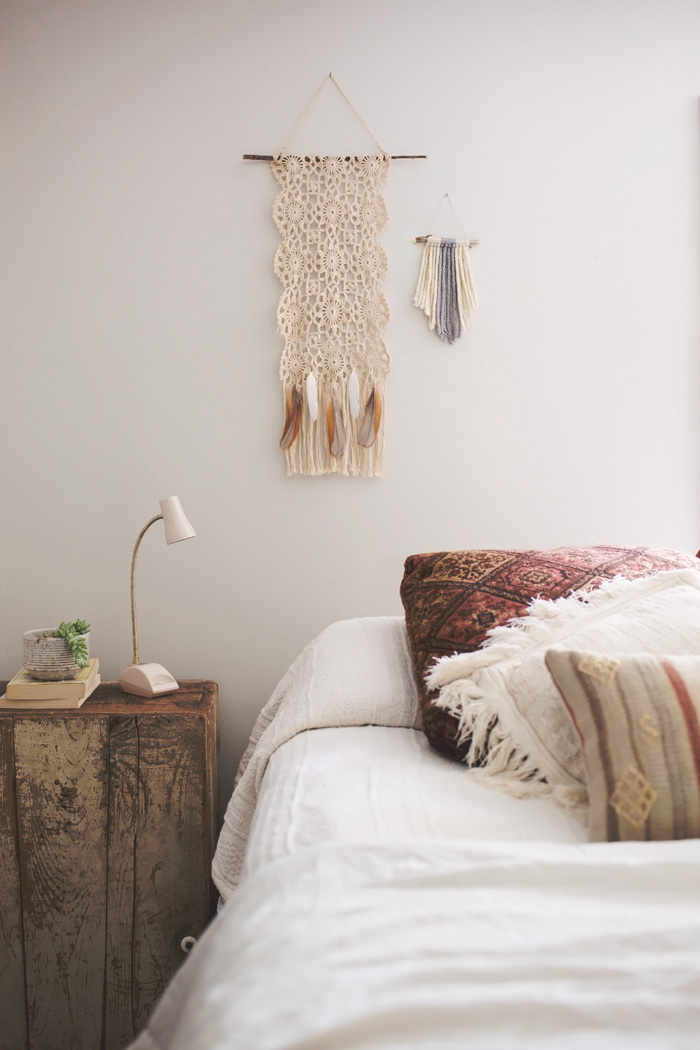
I would describe the look of this piece as a cross between a dream catcher and a weaving, with vintage style.
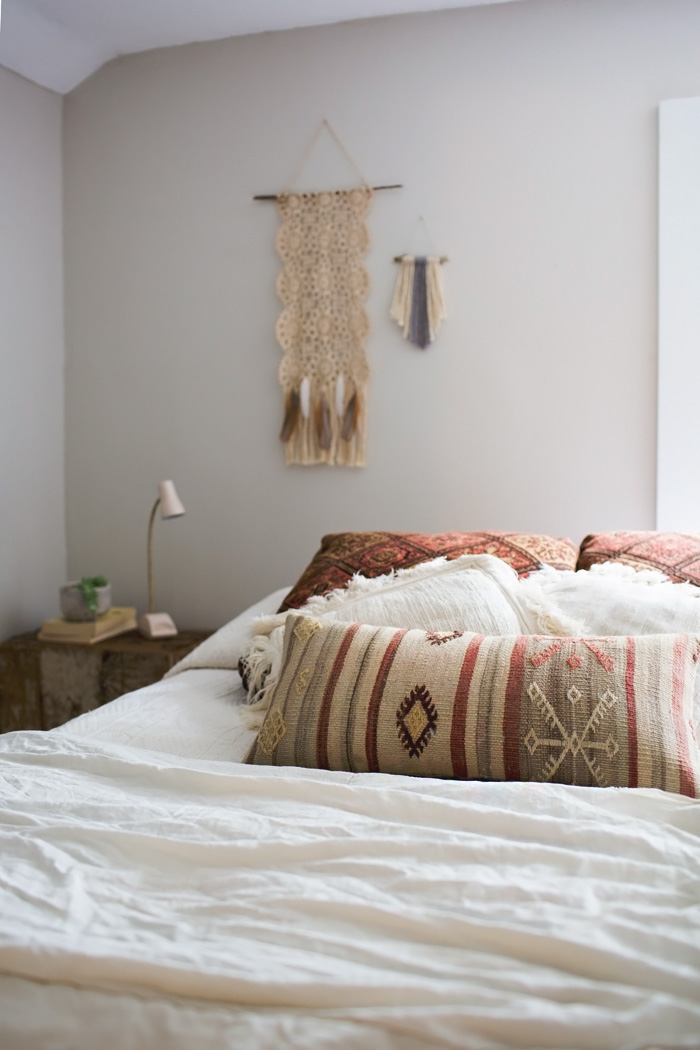
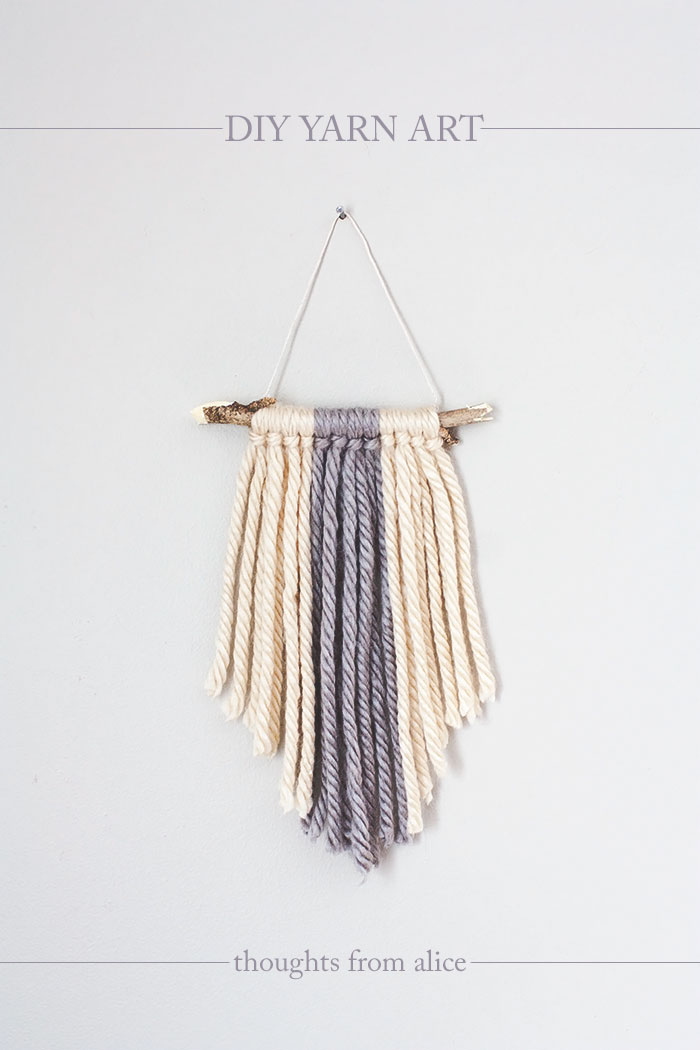
After it was finished, it was time to decide where to hang it! I opted for the spot above my side of the bed, next to my other little textile art that you can read how to make
here. I already had a nail there, so it was perfect. The two look really cute together and give my bedroom space the boho vibe I love.
Kilim and vintage fringed throw pillows also add to the bohemian ambiance in the room.
I’m actually in the process of working on a complete bedroom makeover that I will be sharing here in a couple of months. We are going to be moving to the smaller of the two bedrooms and moving the kids to this room so they have more space and room for toys. Then hopefully Josh and I will actually have a peaceful, welcoming bedroom retreat and I can get more toys out of the living room. Win-win. Right now this master bedroom is basically a storage room (aka my art studio that I can’t even use because of the clutter) with our bed in it. But not for long! I can’t wait to share the makeovers of both of these spaces with you, so make sure you follow along with me below, and sign up to get my posts directly in your inbox!
Till next time…
~Alice W.
Follow along with me!
Want to make sure you never miss a post? Subscribe below!
You might also like:


i LOVE this! emmy and i have been making doily dreamcatchers and we passed up some rectangular doilies…. no more!
ReplyDeleteThanks so much Cassie! It's always a treat when you visit 😉
DeleteThis comment has been removed by the author.
ReplyDeleteAdorable and totally adds that gorgeous Boho Vibe to your bedroom!!!
ReplyDeleteThanks so much Roselle!!
DeleteLove it!
ReplyDeleteTania
Thank you Tania!!
DeleteVery creative love the added feathers. Think I may have something like this in my stash. May have to borrow this idea.
ReplyDeleteCathy <;)
Yes, do! It was so easy! Thanks for visiting Cathy 🙂
Deletesuper creative, got to make one now… also noticed your new beautiful bed spread 🙂
ReplyDeleteThank you so much Sandra!! 😉
DeleteFrom what I can see in these photos, if you added nothing else it would be perfect! I love the simplicity in these pictures.
ReplyDeleteThanks Rhonda! I am going for a more simplified look these days!
DeleteThis is gorgeous!!
ReplyDeleteThank you so much Tanya!!
DeleteI love this, Alice—very simple but eye catching.
ReplyDeleteGreat idea! Goes with your style 🙂
Jane x
Oh my, so pretty! I would never have thought of that in a million years. It could not be more perfect for that spot on your wall.
ReplyDeleteWhat an amazing find! Can't say I've ever found a doily like that. So pretty and I really love the way you embellished it.
ReplyDelete